Understanding How API's Work by Building a Simple API

I am a backend developer learning the MERN stack, I am looking to leverage my tech skills to solve real-world problems. I am also a technical writer sharing knowledge on the things I learn as immediately I learn them.
Looking for a junior backend developer or technical writing role
Understanding How API's Work by Building a Simple API
APIs are an essential part of modern applications. They allow users to communicate with servers and make requests from the client side. Most websites on the internet use one or multiple APIs to carry out various functionalities and perform their services efficiently.
However, it is difficult for most beginners to grasp the concept of APIs and how they work. There are already numerous articles that try to explain this in detail, so this tutorial will be taking a different approach: explaining the underlying principles of APIs by building one for a simple blogging application.
Prerequisites
If you want to follow along with this tutorial, there are some things you will need to have ready.
- Nodejs and NPM installed on your computer: You will create a server for your API with the Node.js Express framework.
- Basic understanding of JavaScript: This tutorial will use a simple JavaScript array as the database and JavaScript functions to interact with the array. Even if you are not familiar with the JavaScript programming language, each code block will be thoroughly explained.
- Endpoint testing tool like Postman: After you have created your API, you will need to test the endpoints with a tool like Postman or the Thunder Client Vscode extension.
Let's get started by creating a JavaScript array, which will serve as the application's database.
Step 1: Initializing An Array for the Database
An API needs to be connected to a database to store and retrieve the data it works with. Normally, you would need a real database, like MySQL or MongoDB, which come with different features that allow you to build large applications; however, you will just be using an array since you won't need most of the features they offer.
Create a separate file called database.js and write the following code into it.
// Instantiate an empty array as the database
const fakeDb = [];
This code simply creates an empty database called fakeDb; this array will hold all the data for your posts. In the next set of steps, you will create functions that mimic the four main database functions: Create, Read, Update, and Delete.
Step 2: Creating A Function for Adding Data
APIs call a database function when inputting data into the database. Imagine that when a new video is uploaded to YouTube, an API calls a function that stores the data of the new upload in the database.
In this case, since you are building a blogging application, you need a function, let's call it,createPost to take in the data for the post and add it to the database. Now, add this code to the one already in the database.js file.
function createPost(author, content) {
    let newPost = {
        author,
        content,
    };

    fakeDb.push(newPost);
    return {
        data: newPost,
        message: newPost.author + " created a new post",
    };
}
The createPost function takes in two arguments, the "author" (creator of the post) and the "content" (actual text data of the post) and creates a newPost object with it. This post is then added to the fakeDb with the push method.
Your post object could have additional properties like Title, Description, Genre, etc. But this tutorial will stick to two properties for simplicity reasons.
To make things easier when consuming the API from the frontend, each function will return two properties:
data: contains the main result of the function (in this case, thenewPostthat was created).messagereferences the action that was just completed (in this case, the creation a new post)
Now, test out the function by adding this code to the database.js file.
let author = "John Doe";
let content = "Lorem ipsum dolor sit amet.";

console.log(createPost(author, content));
This code creates author and content variables, passes them into the createPost function and logs the result to the console. If your code is working properly, you should get this result in the console when you run node database.js in the terminal.
{
  data: { author: 'John Doe', content: 'Lorem ipsum dolor sit amet.' },
  message: 'John Doe created a new post'
}
You have successfully added a post to the database, but what if you need to view the database or this particular post that you just added? That's where functions for reading and retrieving data come in; more of that in the next section.
Step 3: Creating Functions for Reading Data
When an API needs a particular resource, a function is called to read the data in the database. In most applications, you would usually find two functions of this kind.
Function for Reading or Retrieving Multiple Data
The first function retrieves multiple pieces of data from the database; this could be the entire database or just a select group of data. It's kind of like when you get multiple videos from a particular channel on YouTube. This will be implemented for the application in a function called getAllPosts
function getAllPosts() {
    // `fakeDb.length` returns the number of elements in an array
    // "!fakeDb.length" gives "true" when the returned number is 0 (array is empty)
    if (!fakeDb.length) {
        return {
            data: null,
            message: "There are no posts in the database",
        };
    }
    let allPosts = [...fakeDb];
    return {
        data: allPosts,
        message: "All the posts in the database",
    };
}
The getAllPosts function first checks if the database is empty and returns an object with an error message if it isn't. The essence of this check is so that the API does not return an empty array, which will give errors when certain functions are called on it.
If the database is not empty, the contents of the database are assigned to the allPosts variable and returned in an object, along with a message that labels the data as all the posts in the database.
Function for Reading or Retrieving Singular Data
The second function retrieves a single object from the database. This is used when data that meets a particular requirement is needed, like when you search for a video by title on YouTube. This will be implemented for the application in the getPost function.
function getPost(index) {
    // Arrays use 0 indexing, so you have to subtract 1 from the provided number
    index -= 1;
    let post = fakeDb[index];

    if (!post) {
        return {
            data: null,
            message: "Could not find the post you are looking for",
        };
    }

    return {
        data: post,
        message: "A post by " + post.author,
    };
}
The getPost function is called with an index that translates to the position of the object in the database. Since your database is an array of objects, you can access each object with its index value. Just like the first function, this function first checks if the required post exists and returns an object with an error message if it does. If the post does exist, it is returned in an object along with a message that labels the data as a post by the author who created it.
You can check that your functions for reading data are working by checking for the post created in the previous section using this code block.
console.log(getAllPosts());
console.log(getPost(1));
You should get the following results in the console:
{
  data: [ { author: 'John Doe', content: 'Lorem ipsum dolor sit amet.' } ],
  message: 'All the posts in the database'
}
{
  data: { author: 'John Doe', content: 'Lorem ipsum dolor sit amet.' },
  message: 'A post by John Doe'
}
Now that you have functions for reading data, let's discuss a function for deleting data in the next section.
Step 4: Creating A Function for Deleting Data
If an API can add data, it should also be capable of removing said data, for whatever reason. APIs do this with a delete function, which goes into the database, finds the required object and removes it. You will create the deletePost function to delete posts from the fakeDb array in the database.js file.
function deletePost(index) {
    index -= 1;
    let post = fakeDb[index];

    if (!post) {
        return {
            data: null,
            message: "Could not find the post you want to delete",
        };
    }

    // If post does not exist, this line will return an error
    fakeDb.splice(index, 1);

    return {
        data: post,
        message: post.author + " deleted a post",
    };
}
The deletePost function takes in the position of the post object to be deleted as an argument. Like the getPost function, it first checks if the post exists before removing it. This is also to avoid errors that could cause the code in the API to throw an error message. Since the database is an array, the code uses the Array.splice() method to remove the post from the database, then returns an object with the removed post as the data and a message that a particular author just deleted a post.
console.log(deletePost(1));
console.log(getAllPosts());
This code confirms that the delete function works properly. It calls the deletePost function on the first post in the database, then calls the getAllPosts function which should return an error message since there are no longer any posts in the database.
{
  data: { author: 'John Doe', content: 'Lorem ipsum dolor sit amet.' },
  message: 'John Doe deleted a post'
}
{ data: null, message: 'There are no posts in the database' }
In the next section, you will create the last primary API function, which is used to update objects in the database.
Step 5: Creating A Function for Updating Data
Assuming an object has changed since it was added to the database and you want to correct it, you would first need to delete the old data and replace it with the new one. However, a separate function for updating data is much more efficient. TheupdatePost function will help us change the details of post objects in the database.
function updatePost(index, newContent) {
    index -= 1;
    let post = fakeDb[index];

    if (!post) {
        return {
            data: null,
            message: "Could not find the post you wanted to update",
        };
    }

    post.content = newContent;
    return {
        data: post,
        message: post.author + " updated a post",
    };
}
TheupdatePost function is just like thedeletePost function, but instead of removing a post, it just assigns the replacement content data to that position. This change is reflected in thefakeDb array because JavaScript objects are reference types. Only the content property is changed because the author property is reserved for the original creator of a post.
let author2 = "John Doe";
let content2 = "Lorem ipsum dolor sit amet.";
console.log(createPost(author2, content2));
console.log(getPost(1));

let newContent = "The quick brown fox jumped over the lazy black dog.";
console.log(updatePost(1, newContent));
console.log(getPost(1));
The code block above is to test that the updatePost function works. First, create a new post object (since you deleted the former one in the last section), then use the getPost function to check that the post was created successfully.
{
  data: { author: 'John Doe', content: 'Lorem ipsum dolor sit amet.' },
  message: 'John Doe created a new post'
}
{
  data: { author: 'John Doe', content: 'Lorem ipsum dolor sit amet.' },
  message: 'A post by John Doe'
}
{
  data: {
    author: 'John Doe',
    content: 'The quick brown fox jumped over the lazy black dog.'
  },
  message: 'John Doe updated a post'
}
{
  data: {
    author: 'John Doe',
    content: 'The quick brown fox jumped over the lazy black dog.'
  },
  message: 'A post by John Doe'
}
Next, the post is updated with new content, and then the getPost function is called again to confirm that the post was updated successfully
Now that you have created your API functions, you will connect them to an Express server. But first, you need to export the API functions out of the database.js file so that other files can require and use them.
module.exports = {
    createPost,
    getAllPosts,
    getPost,
    deletePost,
    updatePost,
};
This code uses the module.exports to export an object containing the API functions, so they can be used in other files.
Implementing The API With an Express Server
First, you need to install the Express package, which you will use to create your server. You can do this by running the code below in the terminal.
npm install express
Next, create another file called index.js in the same directory where you created your database.js file. This file will contain all the code for the implementation of your Express server.
const express = require("express");

const app = express();
const port = 3000;

// Middlewares
app.use(express.urlencoded({ extended: true }));
app.use(express.json());

app.listen(port, (req, res) => {
    console.log(`Server is running on port: 3000`);
});
First, the code requires the express package and creates an instance of it in the app variable. Next, there are middlewares to handle incoming request data from the client side. Lastly, the app listens out for requests from a port number (3000) and logs a message to the console whenever the server is running successfully.
Next, lets bring in the API functions into the index.js file. Insert this code in the second line, immediately after the code that requires the express package.
const {
    createPost,
    getPost,
    getAllPosts,
    deletePost,
    updatePost,
} = require("./database");
This code uses the object deconstruction method to bring in the API functions from the database.js file. Next, you will define several endpoints between the middlewares and theapp.listen function, which will trigger their assigned functions once a request is made to them.
The "GET /" Route:
A GET request is used when you need to retrieve information from the server. The "/" endpoint is the default endpoint of any API; most applications use this route to render the home page. But since you are making a blog API, it will return all the available blog posts with the getAllPosts function:
app.get("/", (req, res) => {
    let posts = getAllPosts();
    res.send(posts);
});
When the app.get method is called, it takes in two arguments:// the route the request is being made to and a callback function that takes in req (request) and res (response) arguments and is executed whenever the endpoint is reached.
In the callback function for the code above, the posts in the database are obtained with the getAllPosts function and assigned to the posts variable. This variable is then sent as a response using the res.send method.
The "GET /:id" Route
An endpoint in the form /:<variable> simply allows you to add an additional parameter when making a request to the "/" route. This parameter can be referenced with your chosen variable name in the req.params object. This makes it perfect for the getPost function where you need to pass the index of the post you want.
app.get("/:id", (req, res) => {
    let id = req.params.id;
    let post = getPost(id);

    res.send(post);
});
Theapp.get method is once again called, but this time it's on the "/:id" route. The first line of code in the callback function gets the id from the req.params object and stores it in a id variable. This means that when you make a request to "/3", the value of id will be "3", and since this value is passed into the getPost function, you will get the 3rd post in the database. The result from the getPost function is then stored in the post variable and sent as a response.
The "POST /" Route
POST requests are used to send information from the API to the server. And since the "/" endpoint is like the main endpoint of an application, you can use the createPost function to add new blog posts via this route.
app.post("/", (req, res) => {
    let author = req.body.author;
    let content = req.body.content;

    let createdPost = createPost(author, content);
    res.send(createdPost);
});
In this code block, the app.post method, which also takes in an endpoint and a callback function as arguments, is called. The author and content variables needed to create a new post are obtained from the req.body object.
In most applications, the data is sent into the req.body with the help of a form, but since this application does not have a frontend, you will have to manually input the data. Finally, a new post is created with thecreatePost function, and the results are sent as a response.
The "DELETE /:id" Route
Like the name implies, the DELETE request is used to send delete requests to the server. When this request is made, some details about the file to be deleted also needs to be sent along with it, which is why you are using the "/:id" route, so the post's position can be included.
app.delete("/:id", (req, res) => {
    let id = req.params.id;

    let deletedPost = deletePost(id);
    res.send(deletedPost);
});
The app.delete method is called with the "/:id" route as the first argument and a callback function as the second. In the callback function, you get the id from thereq.params object and pass it into the deletePost function. The data gotten back is assigned to a variable and returned as a response.
The "PUT /:id" Route
The final endpoint you are creating is for sending PUT requests to the server. This allows us to update data in the database. You will also want the server to know what post you are updating, so you need to use the "/:id" route once again.
app.put("/:id", (req, res) => {
    let id = req.params.id;
    let content = req.body.content;

    let updatedPost = updatePost(id, content);
    res.send(updatedPost);
});
First, the id and content variables are obtained from the req.params and req.body objects, respectively. The variables are then passed into the updatePost function, whose results are assigned to a variable and sent as a response.
In the end, your entire index.js file should look like this.
const express = require("express");
const {
    createPost,
    getPost,
    getAllPosts,
    deletePost,
    updatePost,
} = require("./database");

const app = express();
const port = 3000;

// Middlewares
app.use(express.urlencoded({ extended: true }));
app.use(express.json());

app.get("/", (req, res) => {
    let posts = getAllPosts();
    res.send(posts);
});

app.get("/:id", (req, res) => {
    let id = req.params.id;
    let post = getPost(id);

    res.send(post);
});

app.post("/", (req, res) => {
    let author = req.body.author;
    let content = req.body.content;

    let createdPost = createPost(author, content);
    res.send(createdPost);
});

app.delete("/:id", (req, res) => {
    let id = req.params.id;

    let deletedPost = deletePost(id);
    res.send(deletedPost);
});

app.put("/:id", (req, res) => {
    let id = req.params.id;
    let content = req.body.content;

    let updatedPost = updatePost(id, content);
    res.send(updatedPost);
});

app.listen(port, (req, res) => {
    console.log(`Server is running on port: 3000`);
});
Now, run this command in your terminal to start the server:
node index.js
You should get this message in the console to confirm that the server connection has been made locally. In the next session, you will proceed to test the different endpoints on the server.
Testing The Endpoints of The API
Now that you have successfully created your API, let's make some requests and observe at how it operates. Browsers can only directly make GET requests, so you need a different tool to test your endpoints.
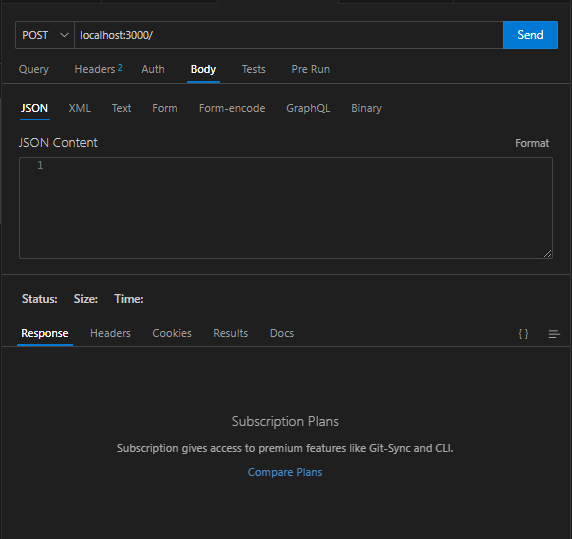
One common tool for this use case is Postman, which allows you to send requests to your API and observe its functionality, performance, and responses. You can install the desktop application on your computer here. There is also the option of using ThunderClient, a VS Code extension for making requests.
To start making your requests, enter your URL into the search bar of the tool you are using and choose what type of request (GET, POST, PUT, or DELETE) you are making. Since you are hosting the server locally, your URL will belocalhost:3000. The 3000 there is the port number your server is listening to.
So when you make a GET requestlocahost:3000/, you should get the following response:
{
    data: null,
    message: "There are no posts in the database",
};
You are only getting this response because the fakeDb array database is currently empty. Let's make some requests to populate the database in the body tab where you can input data for your posts.
There are multiple ways to input data into thereq.body object, but a straightforward way is to enter it in JSON format. With this method, you can simply input your object with the author and content properties.
{
    "author": "William Shakespeare",
    "content": "To be or not to be-that is the question: Whether 'tis nobler in the mind to supper The slings and arrows of outrageous fortune, Or to take arms against a sea of troubles, And, by opposing, end them."
}
Be sure to put your object property names in quotes, i.e.;
"author"instead ofauthor.
After pasting this code in the JSON field, change your request type to POST and send the request tolocalhost:3000/. Just like you configured in the backend, you should get this response from the API:
{
  "data": {
    "author": "William Shakespeare",
    "content": "To be or not to be-that is the question: Whether 'tis nobler in the mind to supper The slings and arrows of outrageous fortune, Or to take arms against a sea of troubles, And, by opposing, end them."
  },
  "message": "William Shakespeare created a new post"
}
Now, if you want to confirm that this has been added to your database, make a GET request to the localhost:3000/ route. Now that the database is no longer empty, you will get this response.
{
  "data": [
    {
      "author": "William Shakespeare",
      "content": "To be or not to be-that is the question: Whether 'tis nobler in the mind to supper The slings and arrows of outrageous fortune, Or to take arms against a sea of troubles, And, by opposing, end them."
    }
  ],
  "message": "All the posts in the database"
}
You could also add additional parameters to the endpoint when you are making a request. For example, if you want to get the post you just added,. You would need to make a GET request to thelocalhost:3000/1 endpoint, and you should get a different response.
{
  "data": {
    "author": "William Shakespeare",
    "content": "To be or not to be-that is the question: Whether 'tis nobler in the mind to supper The slings and arrows of outrageous fortune, Or to take arms against a sea of troubles, And, by opposing, end them."
  },
  "message": "A post by William Shakespeare"
}
The "1" you added at the end of the URL is passed into the req.params object which is then passed into the function for retrieving posts. If you made a request to localhost:3000/23, the ID value would be "23", and since you don't have up to 23 posts in the database, you will get an error response.
{
  "data": null,
  "message": "Could not find the post you are looking for"
}
Making the other requests should be pretty straightforward, so I will not be touching on that. However, if you come across any issues, you can always leave a comment in the comment section, and I will be sure to check back and give you a response, just like an API:).
What to do next
Congratulations, You just built a fully functional API that can receive requests, make changes to an array that serves as the database, and then return responses. However, this is only the beginning of your journey into building a full-fledged application. This current implementation still has a few shortcomings:
- You still need to make the requests manually. Consider adding a frontend which has forms users can use to input content more easily. The users would also be able to view the posts in a better layout.
- The database loses all its data once you shut down or restart the server, so you might want to use a persistent database, like LocalStorage, or external database providers.
- You can only access the application on your computer right now. If you want anyone from anywhere to be able to access it, you may want to host your application on a cloud server, like Digital Ocean.
Thank You very much for reading to the end, You can check my page for more posts or reach out me via any of the links on my profile.


